
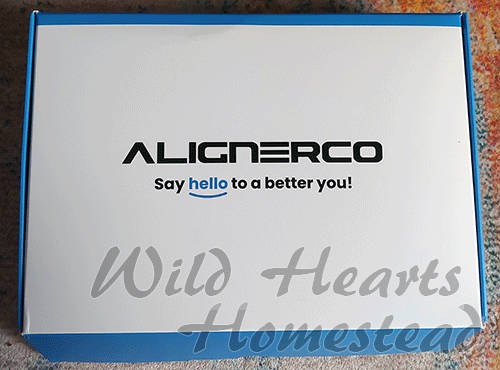
The other day I posted my first AlignerCo review, which basically just went over my history with clear aligner companies and my experience getting started with AlignerCo.
I wanted to share a bit more about the impression process, but felt my last post was getting a bit long already. So in this update I’ll share my experience taking my own dental impressions.
I Hate Taking Dental Impressions
Ever since I was a kid, for whatever reason, getting dental impressions has made me gag. During my very short stint in braces as a kid, probably my least favorite part of the whole experience was getting my impressions done. Now, a lot of orthodontists use a fancy 3D teeth scanner, so impressions are somewhat a thing of the past. But I’m old, so I had my impressions done the old-fashioned way as a kid.
While using tele-dentistry companies such as AlignerCo means you don’t have to deal with visiting the orthodontist’s office, it, unfortunately, doesn’t mean you get away from taking dental impressions. You just have to do them yourself, which I guess could be good or bad depending on how you look at it.
AlignerCo Impressions Attempt 1
I received my first impression kit from AlignerCo 6 days after placing my aligner order. The kit contained three sizes of impression trays – small, medium, and large, plus the base and catalyst putties. They also sent an instruction booklet and some rubber gloves. You have to mix the base and catalyst putties to try to get a uniform color. But you have to work quickly, because once mixed, the putty starts to harden within a couple of minutes. Once the putties are mixed, you roll them out, put them on the impression tray, and take your impression.
My instructions here suck, but AlignerCo does send decent instructions. I also found videos online that gave tips for taking good impressions.
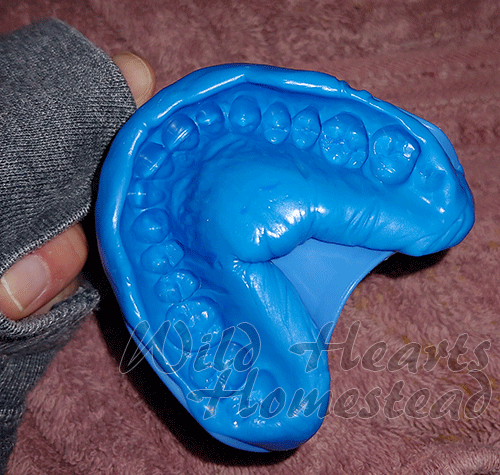
AlignerCo directed me to take one trial impression, then to email them photos so they could check my work. It seemed like they wanted to check that I was doing everything right before I used up all my impression material. This was my first, trial, impression…
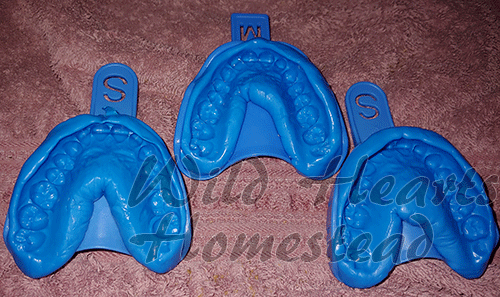
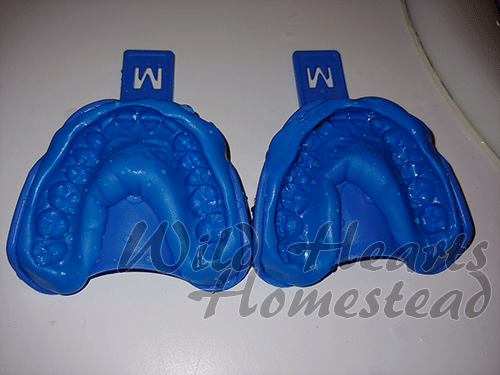
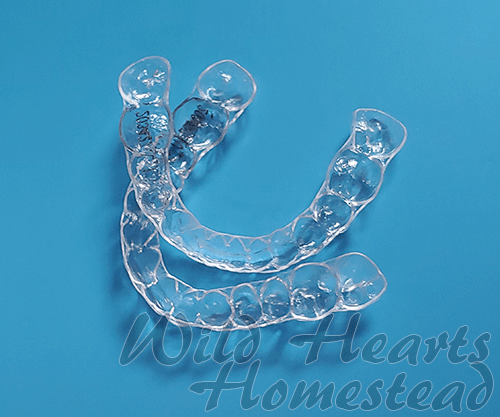
AlignerCo told me the impression looked ‘workable’, which seems to be their go-to phrasing, and asked me to go ahead and use the rest of my supplies to take more impressions. These were the rest of them. There are three upper impressions because they include my trial impression, plus my two lower impressions.
I didn’t find following the instructions to take the impressions to be difficult. However, I had a hard time keeping the trays in my mouth for the amount of time that was needed for the putty to harden. The trays and putty in my mouth would make me drool and gag, and taking one of the upper impressions even made me throw up. Fun. Sorry AlignerCo. I…uh…washed the trays as best I could before sending them in!
AlignerCo asked me to send them photos of all my impressions before mailing them back. I did. They said they looked “workable” again and instructed me to send them in.
Aligner Fit Tray
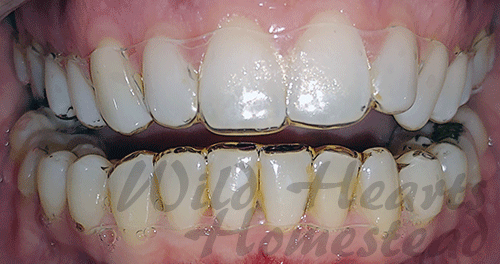
AlignerCo used my first set of impressions to create my 3D treatment model, but then updated and said that my original impressions were ‘slightly compromised’. They wanted to send me a fit tray to make sure it fit well before continuing to construct my treatment aligners. This was my fit tray…
Woop, your first look at my janky teeth!
After I sent photos of the fit tray on my teeth, AlignerCo said it didn’t fit well enough. It did fit over my teeth, but there was a lot of extra spacing, especially around the top of my bottom teeth. So bring on…
Impression Attempt 2
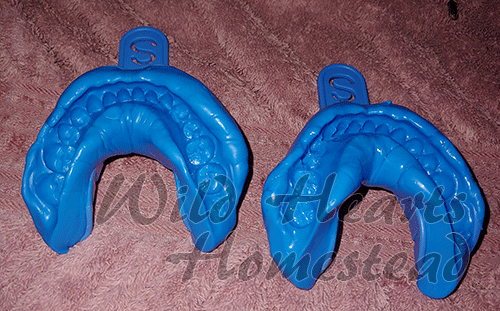
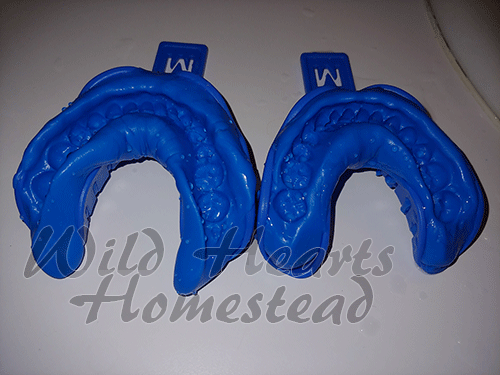
AlignerCo sent me another impression kit, thankfully free of charge, that included medium-sized trays and enough putty to take two upper and two lower impressions. I found taking impressions the second time around a bit easier, maybe just because I had done it before. I have to be honest, I cheated a little the second time around. I purposefully spent a bit longer mixing the putty, hoping that would make it harden faster after putting it in my mouth. Like the first time, I still had trouble keeping the trays in my mouth for the full time it listed on the instructions. But they seemed to come out okay. These were my second attempt impressions…
I wasn’t super convinced that my second attempt was a whole lot better than my first (at least I didn’t barf this time!), but after viewing the photos, AlignerCo told me to go ahead and send them in.
Round 2 Success
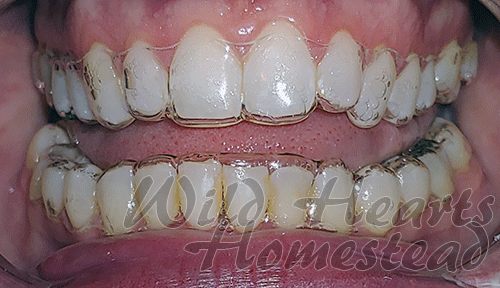
Apparently, my second attempt was better than the first because AlignerCo accepted them and used them to create my treatment trays. They didn’t send me a fit tray the second time around. On May 16th I received my entire set of 15 upper and 15 lower treatment trays, plus a retainer. I started wearing my first treatment tray on May 18th, and so far, so good. The tray seems to fit fine without the excess spacing issues I had in my original fit tray. The actual treatment tray is tight and has been making my teeth a bit sore, but that’s to be expected since it’s starting the process of moving my teeth.
Looking at the photos I guess the first treatment aligner doesn’t look supper different compared to the fit tray, but I think the main differences can be seen around the top of my bottom teeth and the spit bubbles (sorry, gross I know) that you can see on my teeth in the fit tray because the tray wasn’t as tight around my teeth.
Yeah taking all these close-up images with flash of my teeth for AlignerCo and these reviews made me realize how grungy my bottom teeth, in particular, look. I swear they don’t look as gross in person! AlignerCo sent me a complimentary whitening kit that I’ll use at some point. Maybe that will help a bit. Not to mention that fact that now that I’m in treatment aligners at least 22 hours a day, I’ve for sure stepped up the number of times a day I’m brushing and flossing my teeth.
Interested in trying AlignerCo for yourself? You can use my affiliate link to get $150 off your aligner treatment. I will receive a small kickback, at no additional cost to you.
Overall Impression Experience
I doubt there’s anyone out there who really loves taking dental impressions! Count me as someone who really doesn’t enjoy them. But they aren’t the worst thing ever and luckily they don’t take a super long time, so you can get the whole experience over pretty quickly.
I gave this review a rating of 4 stars. Although I didn’t enjoy the impression process, it was fine. I didn’t feel it was fair to give a lower rating just because taking dental impressions sucks. My overall rating of AlignerCo is subject to change as I progress with my treatment.
I found that having a way to distract myself while the impression material was sitting in my mouth was helpful. The second time I took impressions I brought my phone into the bathroom with me and watched Youtube videos while I waited for the putty to harden. I feel like having a distraction helped me keep my focus away from the giant tray of putty in my mouth and helped me to gag less.
AlignerCo offers a service where you can set up a video session with someone on their team who will help you take impressions. I have to admit, while I can see how this would be helpful to some, I wanted to avoid doing this. Sorry, AlignerCo, but I wasn’t super into the idea of someone in a video meeting watching me drool and potentially barf all over myself. Luckily the video meeting doesn’t seem to be a requirement to work with this company as I didn’t utilize that service and they still worked with me.
If you try out AlignerCo, pay attention to the instructions they send you. For example, if you’re completing your first impression kit make sure you follow the instructions and email the company pictures of your trial impression before moving on to taking the rest of your impressions. They’ll offer tips through email if they notice something in particular that you’re doing wrong based on your photos. And they seem to want to see photos of impressions before you send them in, which makes sense. There’s no use making AlignerCo waste money on a shipping label if your impressions are very obviously not going to work.
What’s Next?
I’ll probably put up one more post about my start-up experience, because I want to share some photos from my 3D treatment projection. Besides that, I’m currently only on treatment tray 1 out of 15, so I think it might be a while before I have any significant updates. My current plan is to post my next update once I get to tray 5. So stay tuned, but keep in mind that if you’re reading this as the posts go up, you might have to wait a while before my next update. If all goes well, it should be around a month and a half or so before I get to tray 5.
If you’re reading this in the future…why hello future person! Also, you’re in luck because I likely have more AlignerCo updates out already. You can see all my AlignerCo posts by clicking here.
These posts are in no way sponsored, paid for, or otherwise influenced by AlignerCo. I have no relationship with AlignerCo besides just being a normal paying customer. The company was not made aware that I’d be posting in-depth reviews. I believe my aligner experience to be typical.
I’ve unfortunately been dealing with content scraping websites stealing my content without my permission. You shouldn’t be seeing this post on any website besides wildheartshomestead.com! If you’re reading this on any other site, please consider visiting me over on my official site and contacting me to let me know. Thanks so much!